Cosplaying a character with pockets in his/her outfit, or having a bag as an accessory is a blessing, and oh so rare!! But what about those without pockets? Where can we put our valuables like our phone and money? Sometimes holding them is okay, or having a purse bag but then when we pose for photos, it's a little off to be holding a bag especially when it doesn't fit the character.
The solution I found then was that I always try to put secret pockets on most of my costumes but of course, it doesn't always work especially for short skirts and tight costumes. Hence, I have "cosplay pouches". These are small pouch bags that can fit my phone and a small wallet (or cash), attached to my costume either by a belt, a string, or a safety pin.
I normally place these pouches on my side or at the back, where they won't be easily noticed and yet I have easy access to. Plus points if some costume parts cover it too! I recently made new ones in a bigger size (because new phone OwO) and in different colors to match most of my costumes like red for Supergirl, violet for Liliana, gold and white for other characters. :)
Do you also have "cosplay pouches"? What other ideas do you do to keep your valuables? Share in the comments!~ ^_^
cc: Dukesa Cosplay
Showing posts with label tutorials. Show all posts
09 August, 2018
21 July, 2018
Recycling Costume Pieces
We cosplayers should also know how to be resourceful and creative with what we have~ Cosplaying isn't a cheap hobby after all! ^_^
Here are four cosplayed characters that I have done wherein I recycled a costume! I'll call them by first name: Serenity (Sailor Moon), Emeraude (Magic Knight Rayearth), Celestia (My Little Pony), and Celestia (Shining Tears X Wind).
* The base white dress I used for Serenity (SM), Emeraude (MKR), and Celestia (MLP) is one and the same! Oh yeaaah~~~ ╰☆╮ Emeraude's puff sleeves were used for Celestia, which "tails" can be removed (hand-sewn only). Most of the accessories were separate pieces so it was easy to change the look of the dress. However, I altered the base dress again into the Snow White (OUAT) maternity dress for my pre-natal shoot. So that was a total of five (5) characters using the same material. <3
* I also used the same wig for Emeraude (MKR), Celestia (MLP), and Celestia (STXW) just styled differently! Except that I already dyed it multi-colored for Celestia (MLP).
I also use old pieces of clothing (ukay) to make into costume pieces. Or borrow an accessory, glove, skirt, etc from another character to use for another one. Tee hee~ I'm a big cheapskate cosplayer lol.
09 July, 2018
Storing Custom-Styled Wigs
As we progress in our cosplays, I can say that one of the major improvements that is easily noticed is our wigs. Custom-styled wigs are now readily available to buy from Taobao and other wig shops. But most of the time, the custom wigs we receive gets deformed or ruined from the packaging during shipment and that we still have to fix them ourselves or have our fellow cosplayers, who do amazing wig styling, to fix and re-style them for us. That is why it is important to have a proper storage for our custom wigs to preserve the style and keep it safe.
To store my custom-styled wigs, I made cardboard protectors.
For my wigs like Cinderella (with a bun), Ariel (with high bangs), Sailor Moon (high bangs, buns, ponytails) and other similar characters, one trick that I do is have a cardboard protection around the wig before putting them inside the ziplock plastic bag.
It is made of used cardboard taped together to form a fence-like rectangular shape. I also place a separate cardboard underneath so it is easier to slide the whole wig in and out of the plastic.
Mine is 4in x 6in x 8in for Cinderella. I also placed a thin cardboard flap to put hairpins on because I need to use a lot to hold my wig in place during cosplay.
Sometimes, you may need to provide a bigger actual box for more complex and larger wigs. For example, Rapunzel's wig, or wigs with spikes like Goku's.
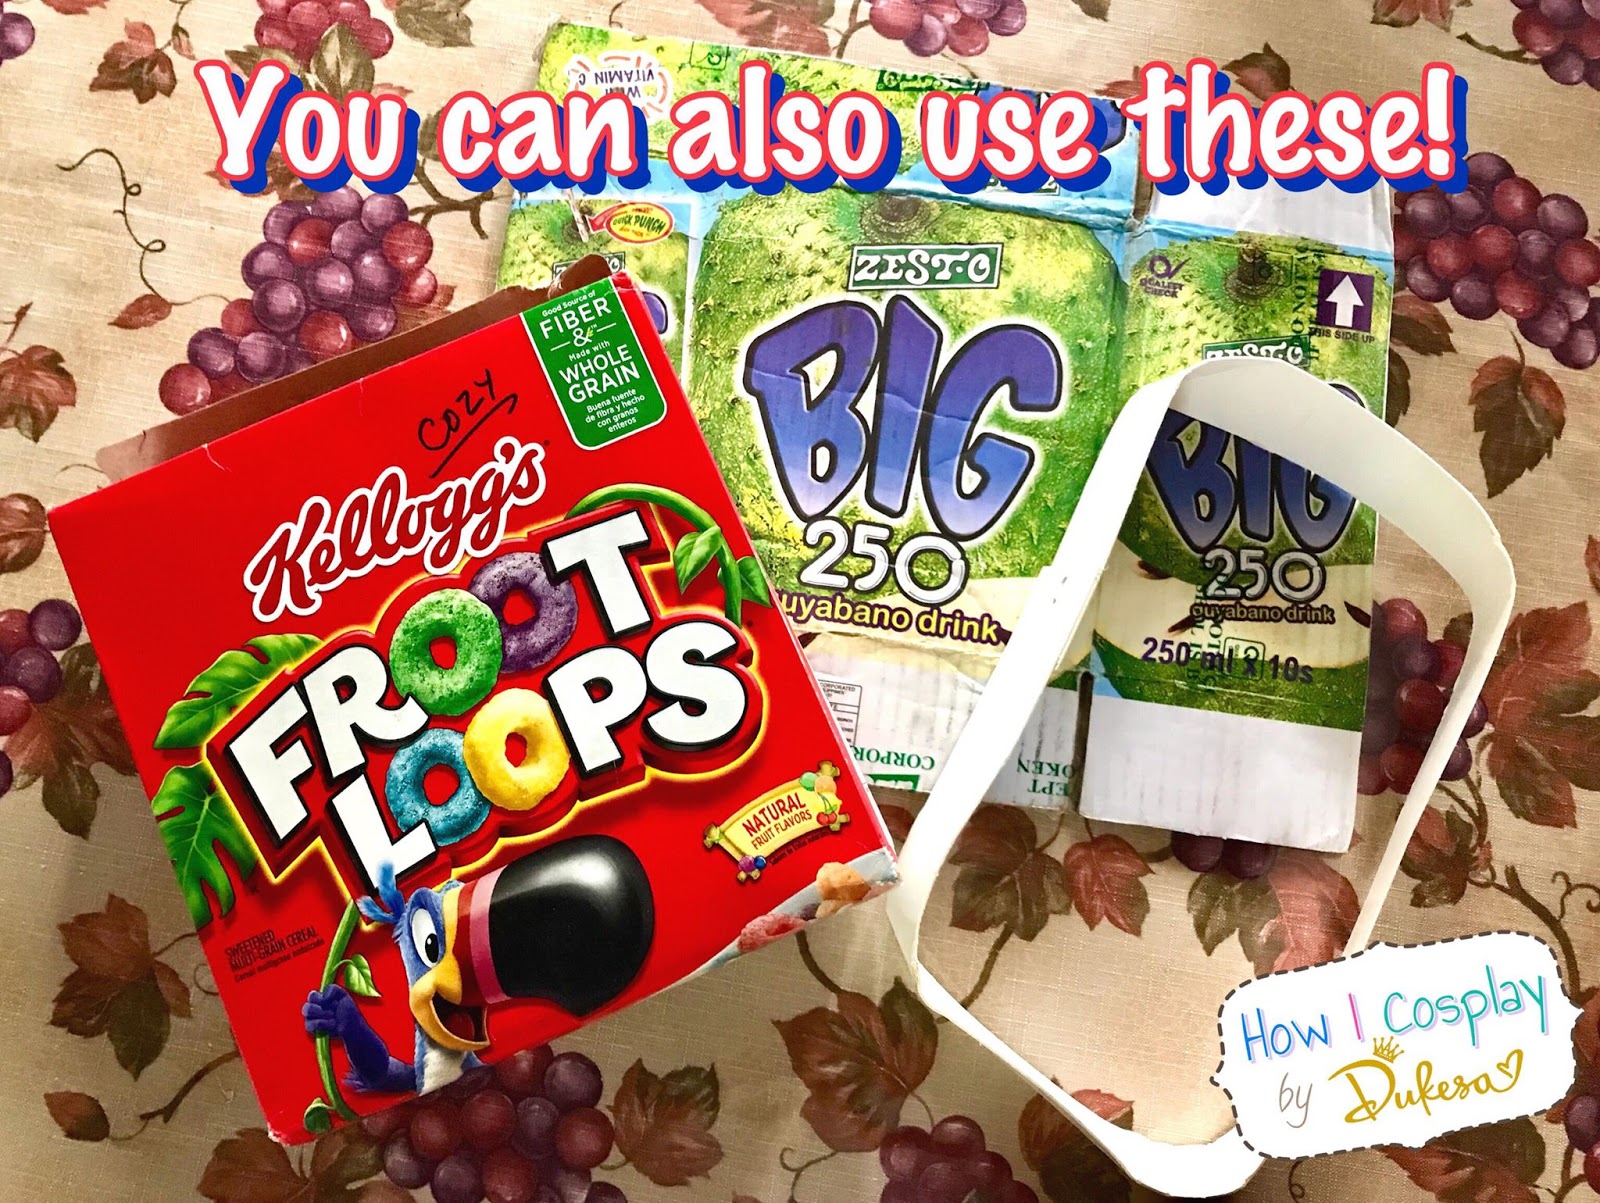
I make my cardboard protectors from used milk boxes. But you can also use plastic shoe boxes, juice boxes, cereal boxes, or the cardboard that comes along with the wigs from the suppliers.
You can use two of white thin wig cardboard and put them together with tape. Once you have the cardboard taped together, you can customize it any way you like: cover it with colored paper, place stickers on it, write the character name - go crazy!
Cardboard protectors aren't good just for storage but also for handling the wig during trips to the event. You can easily pack it in your luggage without having to worry about your wig getting squished by your other costume parts.~
As an extra tip, here is how I pack my costume inside my trolley suitcase in hierarchy:
wig
light prop/accessories
fabric costume parts
shoes/heavy prop
So there! Wigs are totally love so let's do our best to take care of them.~
19 April, 2016
Posing Guides
Get amazing cosplay photos with this great guide for poses!
Look your best by flaunting your best angles~ ^_~
20 July, 2015
Cosplay Facts: Trivia
Wa-hey! Busy week to be working~ So much excitement going on and I
just can't contain!! ☼ ~ So let's start this week with some trivial fun
facts! ♪ ♫
Here are four cosplay that I have done so far, and these four characters have so much in common! No, I did not intentionally do these, it just happened haha \\(>0<)//
I'll call them by first name: Serenity (Sailor Moon), Emeraude (Magic Knight Rayearth), Celestia (My Little Pony), and Celestia (Shining Tears X Wind).
~ 1. Names aside, all of
them are royalty: from princess status to queen. Well at least that's
how their dominance and role in the story are. Emeraude had been called
Princess but we all know she is the only ruling power over Cefiro, which
makes her like the Queen already; the same goes for Celestia (MLP) but
since the return of Luna, the ruling power were split, so Celestia can't
entirely be called Queen. Serenity became Queen in the 21st Century
Moon Kingdom. Only Celestia of Shining Tears was referred to as Queen
from the beginning of the series.
~ 2. Character: Obviously very royal and fine and elegant and soft and fine and royal, wait I already said that,... and magically powerful! \\(^0^)//
~ 3. The base dress I used for Serenity (SM), Emeraude (MKR), and Celestia (MLP) is one and the same! Oh yeaaah~~~ ╰☆╮ Emeraude's puff sleeves were made into what you see Celestia is wearing now. But I can still use the same dress to re-cosplay either of them anytime. I love how flexible the dress had become! ♡
~ 4. Except for Celestia (MLP), the rest were blonde. Makes me want to think her original color was also blonde, but nah, it was really light pink (as based on the illustrations and head cannon theories).
~ 5. Now we are talking about hair color, Emeraude (MKR), Celestia (MLP), and Celestia (STXW) used the same wig! Except that I already dyed it multi-colored for Celestia (MLP).
I hope I inspired you with these cosplay trivia. I feel that I kind of cheated with these cosplays because I just used the same materials, sort of recycled the costume, but not entirely. We cosplayers should also know how to be resourceful and creative with what we have~ Cosplaying isn't a cheap hobby after all!
<(‘o'<) ^( ‘-‘ )^ (>‘o’)>
26 February, 2015
Lagoona Blue: Black Carpet Dress
Hey Ghouls!
As we all know, we simply can't find the exact fabric for Monster High dresses/outfits in fabric stores. There are fabrics with similar prints, but not the exact likeness.
So I'm sharing how I made the prints on Lagoona's Black Carpet dress.
I chose a light pink base fabric, cut the patterns and half-sewn them together before painting. I used acrylic paint and mixed my own paint closest to the color in all references (doll, illustration, movie stills). After drawing the pattern on the fabric, I painted all the parts by color: first light teal and then black. It took me 6 hours to finish painting two layers of paint on each color.
When the paint dried, I finished sewing the dress; adding the sleeves, the two-layered skirts, and zipper. Then I added the silver dots using Tulip Metallics Fabric paint.
And yes, using acrylic paint CAN make the fabric stiff. What I usually do is hang the painted pieces for about a week for the paint to dry properly and then I soak it in a tub of water + fabric conditioner mix for 30 minutes to an hour, constantly checking because soaking it too long might cause the paint to chip off. Acrylic brands I use are Tulco, Folkart, and Tulip. If you can get hold of fabric paint, YES much much better! Textile/fabric paint is best for fabric especially stretchy ones.
02 February, 2014
Makeup Tutorial: Tragic Elf (MTG inspired)
Here's an awesome make-up tutorial video for Tragic Elf (MTG inspired) by Ms. Keisha Ledesma.
She used Dukesa's Box Medium Type 2 Natural color Elf Ears~
Check it out guys~
She used Dukesa's Box Medium Type 2 Natural color Elf Ears~
Check it out guys~

Subscribe to:
Comments (Atom)


